House cleaning pictures serve as more than just eye candy, they’re practical blueprints for tackling real projects. Whether homeowners are planning a kitchen deep clean, bathroom overhaul, or whole-home refresh, visual references show exactly what “done” looks like. Before-and-after photos motivate action and cut through vague ideas about where to start. This guide explores how to use house cleaning pictures strategically, where to find reliable reference images, and how visual planning transforms a daunting cleaning project into manageable, room-by-room work.
Table of Contents
ToggleKey Takeaways
- House cleaning pictures provide concrete visual standards and process steps that transform vague cleaning goals into actionable, room-by-room projects.
- Before-and-after cleaning photos reveal common problem areas, realistic timelines (6–8 hours for a kitchen deep clean), and the critical importance of prep work often overlooked in written instructions.
- Use reference images matched to your actual space size and layout to break projects into distinct phases, preventing overwhelm and guiding product and tool selection.
- Reliable house cleaning pictures come from homeowner blogs, DIY websites, Pinterest, and established sources like Real Simple and Martha Stewart that document genuine conditions with adequate lighting and multiple angles.
- Posting before photos or comparing your current room to target images serves as a visual accountability tool that motivates you through the tedious middle stages of any cleaning project.
Why House Cleaning Pictures Matter for Your DIY Journey
Visual references change the way homeowners approach cleaning and maintenance. A picture of a sparkling countertop or organized closet does more than inspire, it sets a concrete standard. Instead of guessing whether the grout looks “clean enough,” photos show exactly what professional results look like, which helps DIYers know when they’ve actually finished the job.
House cleaning pictures also reveal process steps that written instructions sometimes skip. A before-and-after sequence of a cluttered kitchen shows how organizers were removed, shelves were wiped, and items were sorted. Seeing the intermediate steps prevents costly mistakes, like buying containers before measuring shelf space, or cleaning walls before removing outlet covers.
These images are also accountability tools. Posting before photos in a workspace or pinning them nearby creates gentle pressure to follow through. Many DIYers find that comparing their current room to a target image motivates them to push through the tedious middle stages of a project when enthusiasm naturally dips.
Before-and-After Cleaning Transformations for Every Room
Before-and-after photos document real transformations and help homeowners understand what’s possible in each space. The most useful images show the same angle before and after, making progress immediately clear.
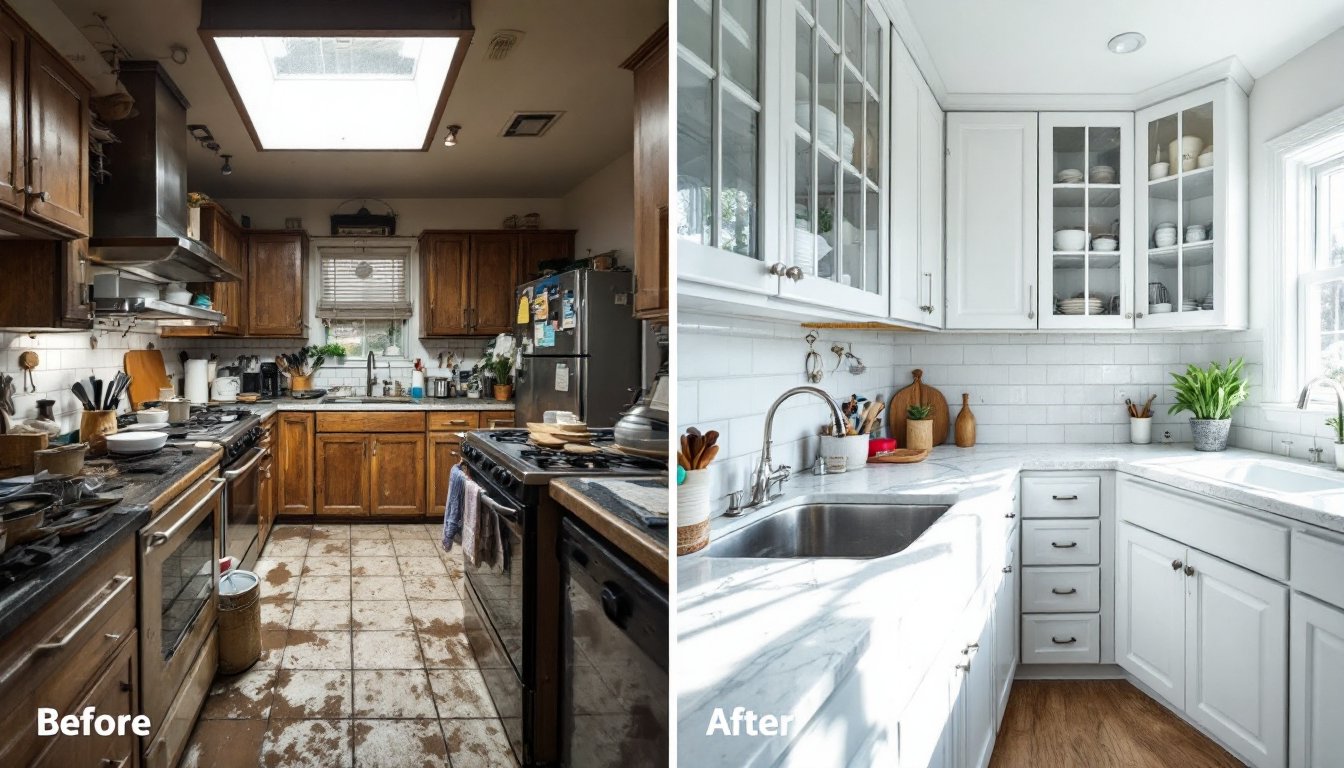
Kitchen Deep Cleaning Visual Guides
Kitchens respond dramatically to systematic cleaning, which is why kitchen cleaning pictures are particularly motivating. High-quality before-and-after images reveal common pain points: greasy stovetops, cluttered countertops, stained grout between tiles, and disorganized cabinets. A well-documented deep clean typically shows: degreaser applied to the range hood and left to sit, cabinets emptied and wiped inside and out, drawer liners replaced, and small appliances removed and cleaned underneath.
Visual guides also demonstrate the importance of prep work. Photos show items moved off counters before any cleaning begins, this step is often glossed over in text instructions but clearly visible in images. Kitchen cleaning pictures from trusted sources show realistic timelines too: a genuine deep clean of a standard kitchen typically requires 6–8 hours of focused work, not a quick afternoon.
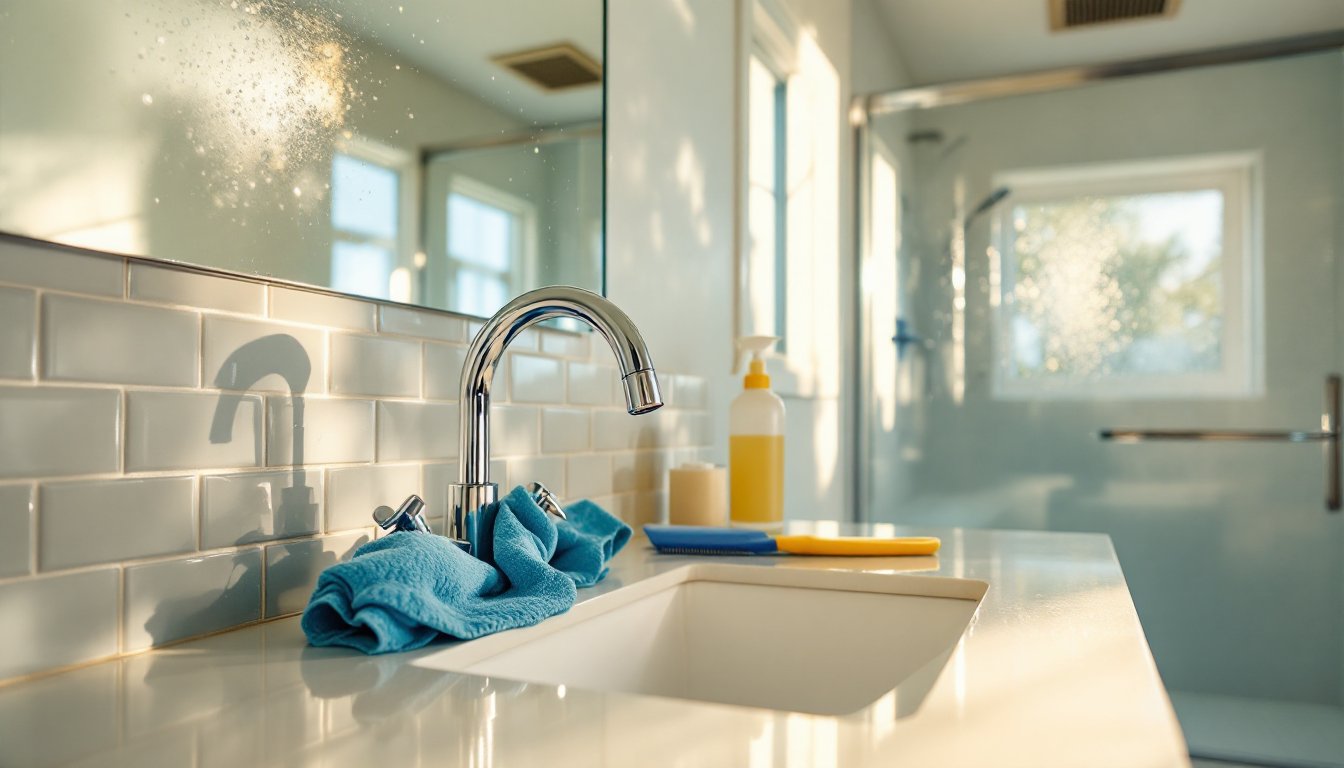
Bathroom Renovation Through Cleaning Photos
Bathroom transformations are equally striking in photographs. Before images often show soap scum on tile, discolored grout, rust stains around fixtures, and cluttered vanities. After images reveal the same space with caulk resealed, grout scrubbed or color-matched, and every surface cleared to bare essentials. Professional resources provide step-by-step bathroom cleaning pictures that show tile-by-tile progress, making the work feel less overwhelming.
Visual references also clarify which cleaning tools and products deliver results. Seeing a before-and-after of a heavily stained tub treated with specific cleaners helps homeowners choose the right product rather than experimenting through trial and error. Bathroom pictures often highlight safety details too, such as proper ventilation during harsh chemical use and the importance of wearing nitrile gloves when handling cleaners.
Using Reference Images to Plan Your Cleaning Strategy
Effective project planning starts with collecting reference images that match the homeowner’s actual space. A picture of a pristine laundry room doesn’t help if it’s twice the size and has different storage. The best reference images are similar in size, layout, and lighting to the room being cleaned.
Once reference images are gathered, the next step is breaking the project into phases. A homeowner might look at a bathroom cleaning picture and identify these distinct stages: remove items and organize, scrub surfaces, address stubborn stains, clean fixtures, and final touches. Visually mapping these phases prevents the overwhelm of trying to tackle everything at once.
Reference images also guide material and tool choices. Looking at pictures of clean grout helps homeowners decide whether they need a grout cleaner, a stiff brush, or professional restoration. Visual guides from trusted sources often include product recommendations tied to the before-and-after results, which removes guesswork. Also, expert cleaning tips for every room provide step-by-step instruction that pairs with visual references to build confidence.
Photos also reveal hidden problem areas. A well-lit after picture might show that baseboards were vacuumed, ceiling corners were dust-free, and light fixtures were wiped, details that improve the final result but are easy to forget without visual reminders.
Best Resources for Finding Reliable House Cleaning Pictures
Finding high-quality house cleaning pictures requires knowing where homeowners and DIYers share real, documented work. General search engines return a mix of professional photography and genuine before-and-afters, but quality varies widely.
Homeowner blogs and DIY websites often post detailed cleaning projects with multiple photos at each stage. These are valuable because they show realistic conditions, not model homes or professionally styled spaces. Many document the exact products used, approximate time spent, and honest assessments of difficulty, which text-only guides often miss.
Social media platforms like Pinterest and Instagram have become major sources for cleaning inspiration, though users should verify that images are actually cleaning projects, not just styled home décor photos. A reliable pin typically links back to a source article with full details.
Magazines and established home guides publish thoroughly documented cleaning and organization projects. Real Simple provides home organization tips and cleaning hacks with clear photography that spans multiple projects. Similarly, Martha Stewart’s collections include home organization and cleaning techniques documented with professional photography that clearly shows before-and-after progress.
When evaluating sources, look for images that show the same angle in both before and after shots, include adequate lighting, and come with written explanation of methods used. Red flags include heavily filtered or styled after photos that don’t match the actual cleanup effort required, or before images that appear staged rather than authentically cluttered.
Conclusion
House cleaning pictures transform abstract projects into concrete, achievable goals. They reveal process details, set realistic expectations, and provide visual accountability throughout the work. By gathering reference images matched to the homeowner’s actual space, breaking projects into phases, and sourcing guidance from trusted platforms, DIYers build confidence and improve results. Start collecting images of spaces that match the goal, choose a room to tackle, and let visual planning guide the work forward.